How to Add Furniture to a Photo

ByQian, founder of DoVirtualStaging

There are three ways to put furniture into a photo of an empty room: shoot the room so it can be furnished later, composite the furniture in by hand, or let a model furnish the room for you. The first one is free and matters most. The other two cost either your evening or $1.50.

What follows is each route in the order that decides the outcome, then the four reasons a hand composite gives itself away — which is also the reason most people end up on the third route.

Try it on your own room — free

No account needed. No credit card.

Disclosure: this site sells the tool described in route 3. Route 2 is written as the real alternative it is — if you have one photo and Photoshop already, use it.

The three routes, and what each one really costs

1. Shoot the empty room properly

10 min · $0

Not a way to add furniture, but it decides whether any of the other two look real. Free, and skipped by almost everyone.

2. Add it by hand

1–3 hours · $0

Cut a sofa out of a catalogue image and composite it in. Genuinely free, and genuinely hard: three physics problems have to be solved, not one.

3. Let AI furnish the room

1–2 min · $1.50 / photo

Upload the empty room, pick a style, get the same room with a furniture set in it. Walls, windows and doors are kept.

Route 1: shoot the empty room so furniture can go in later

Every guide to this topic starts at the editing step, which is backwards. Whatever you add later has to survive the geometry of the photo you took, and a photo taken badly cannot be rescued by any tool — including this one. Five things decide it.

Stand in a corner, hold the phone at chest height

About 1.2–1.5 m, level, not tilted up. Chest height is roughly the height of a seated person's eye, which is where furniture proportions look normal. Shooting down at the floor from standing height makes every piece of furniture look short and wide once it is added.
Use the main lens, not the ultra-wide

Ultra-wide bends the window frames and doorframes near the edges of the frame. Anything added to a bent room inherits the bend. If the room is too small to fit without ultra-wide, take two shots from two corners instead of one wide one.

Turn every light on, and do not use the flash

Flash creates one hard shadow behind the photographer that no piece of furniture will match. Ceiling lights on gives the model (or you) several soft sources to work with, and it is what the room actually looks like at a showing.

Leave 30–40 cm of floor in front of where the sofa goes

Furniture needs floor to sit on. If the frame is cropped tight to the wall, there is nowhere to put anything and the result looks shoved against the baseboard.

Clear the room first

A model built for empty rooms treats whatever is already there as something to replace. A furnished room does not become a furnished-plus room — it becomes a different furnished room. Move the boxes, the air mattress and the ironing board out before shooting.

One more: shoot before you move anything back in. A room photographed while occupied costs more to fix than a room photographed empty and furnished afterwards.

Route 2: add furniture by hand

This is the only route that is genuinely free. The steps are short and the reasons it usually fails are not obvious, so they get their own section below.

  1. 1

    Open the empty room photo in Photopea (free, browser) or Photoshop. Note the horizon: if the camera was level, the horizon sits at the height the lens was held.

  2. 2

    Find a piece photographed from a similar height — furniture retailer images are usually shot from 1.5–1.6 m, straight on, on white. That is close enough to a chest-height room shot to work.

  3. 3

    Cut the piece out, place it, then scale it against something in the room with a known size: a door is 2.03 m, a baseboard is 10–15 cm, a standard ceiling is 2.4–2.7 m.

  4. 4

    Shift the cut-out's colour toward the colour of the wall behind it, then add a soft shadow under and behind it in the direction the window light already falls.

  5. 5

    Add a dark contact line where each leg meets the floor, and blur it by an amount that matches the carpet or the board texture.

Four reasons a hand composite gives itself away

A clean mask is the easy part. These are the four things that still make a pasted sofa look pasted, in the order they are usually noticed.

Perspective — the paste has its own camera

A sofa shot for a catalogue was photographed from about 1.6 m with a long lens. Your room was shot from 1.2 m with a wide one. Scale it until the seat height looks right and the back legs will still sit at the wrong place relative to the floor line. You are matching two vanishing points by eye, and the floorboards in the original shot are the only ruler you have.

Light — direction, then hardness

Every shadow already in the photo came from your window. A pasted piece arrives lit from wherever the catalogue lit it. Flip the piece horizontally until its highlight side matches, and the shadow under it still has the wrong edge: window light is soft and long, studio light is tight and dark. This is the tell that survives at thumbnail size.

Contact shadows — the floating-leg problem

Objects touch the floor. Without an occlusion shadow and a slightly darker contact line where each leg meets the carpet, the piece reads as hovering even when its colour and perspective are right. Adding that shadow by hand means painting a blur that follows the carpet texture, and doing it for every leg, every time.

Colour temperature — the blue intruder

Catalogue cut-outs are usually neutral white. A real room shot under 2700K bulbs is warm, and a real room shot in daylight is cool. Paste a neutral piece into either and it looks like a sticker. You have to sample the wall behind the piece and shift the whole cut-out to match, then match the shadow separately, because shadows are cooler than the surfaces casting them.

None of this is impossible — editors do it every day and charge $16–$24 an image for it. It is just that the work scales with the number of photos, and a six-photo listing is an evening of it.

Route 3: let a model furnish the empty room

Upload the empty room, choose the room type and the furnishing style, and the model returns the same room with a furniture set in it. The walls, windows, doors and flooring are kept; the furniture is lit from the same direction as the light already in the photo, which is the part that is hard to fake by hand.

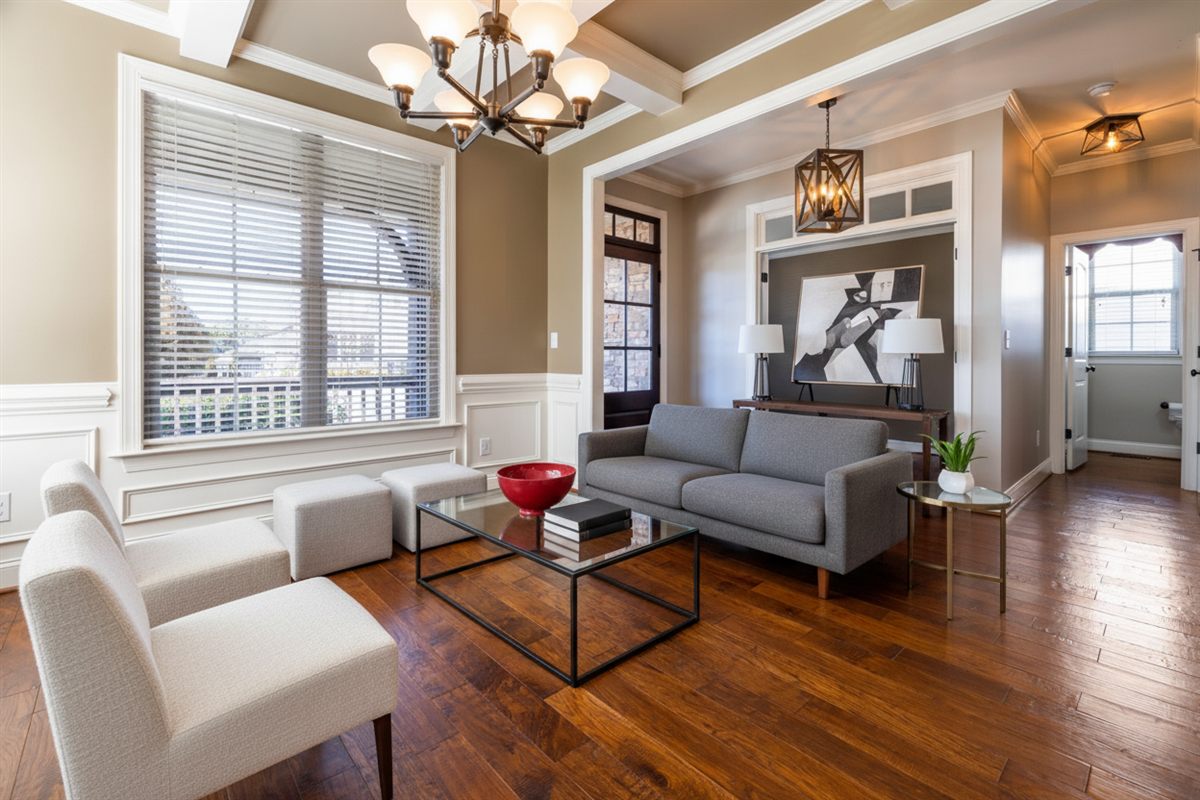
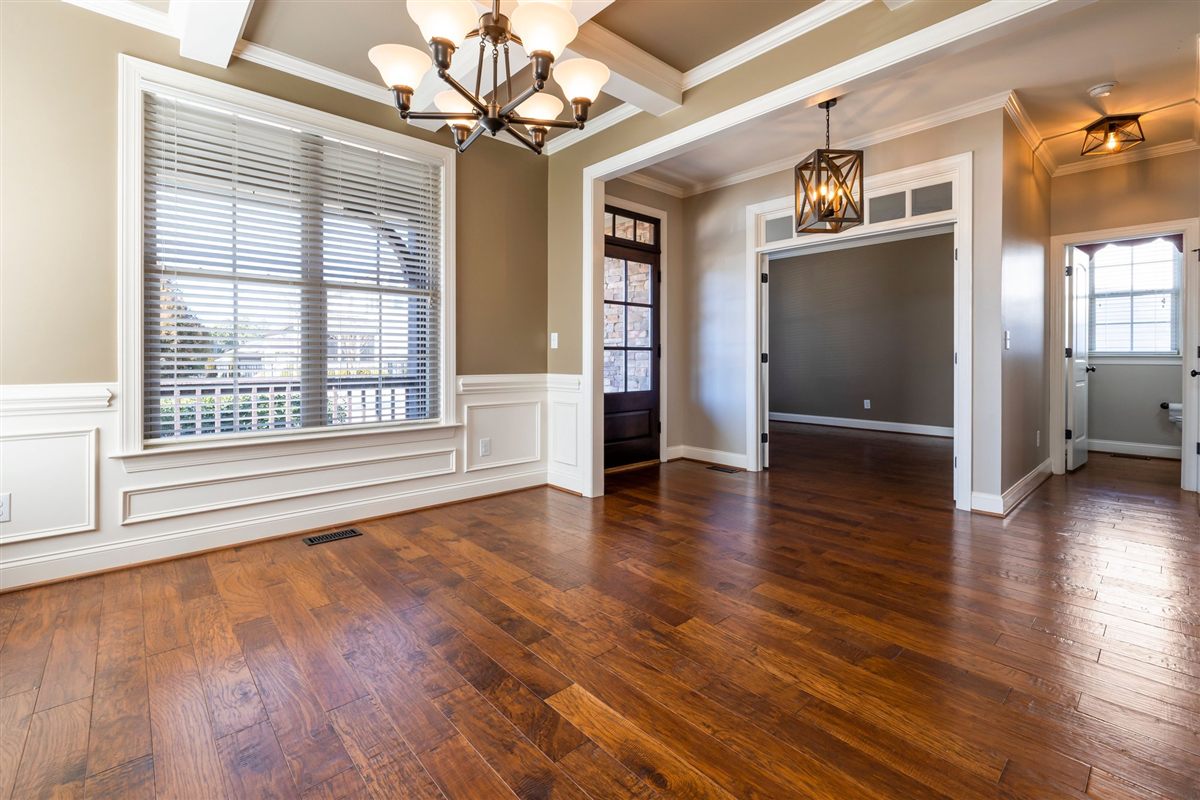
Empty living room photographed from a corner before furniture is added
The input — empty room, shot from the corner
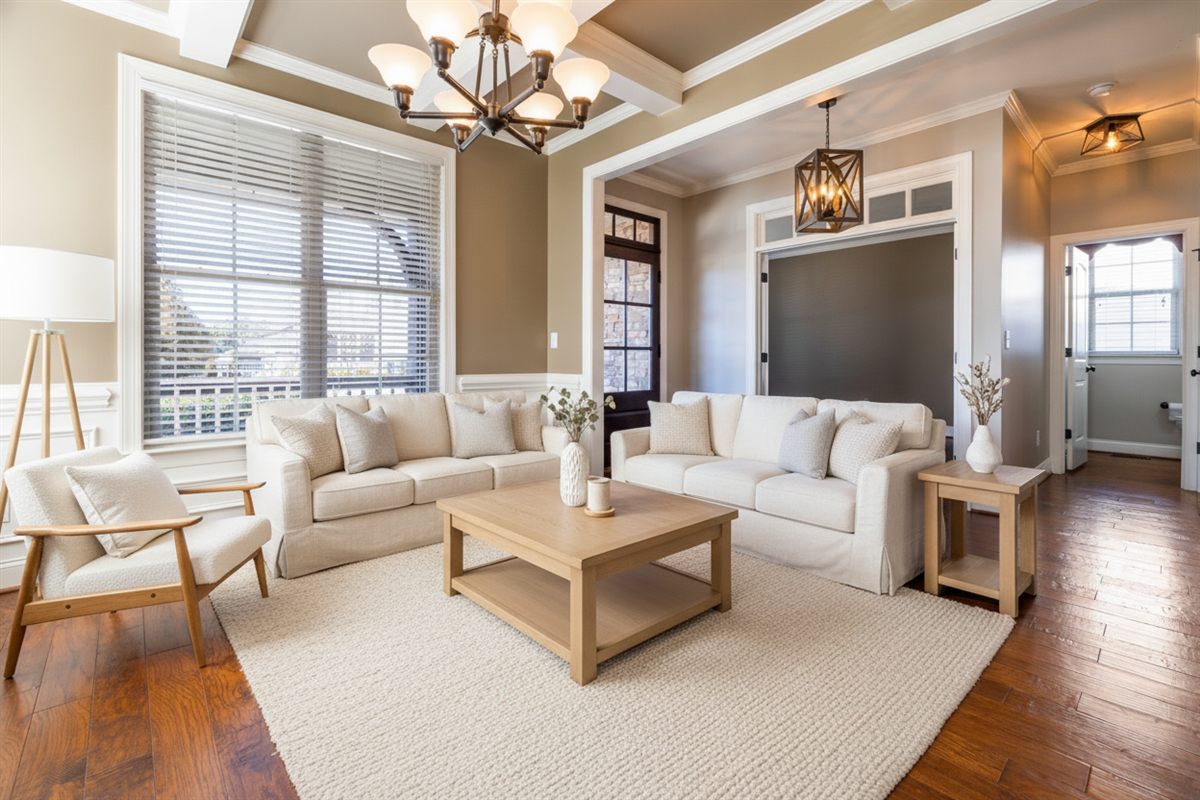
The same living room after Scandinavian furniture was added
Output — Scandinavian set
The same living room after modern furniture was added
Output — modern set, same photo

The same listing photo, furnished twice. Walls, window and flooring are unchanged between the three images.

Try it free — no account, no card

Drop one empty-room photo and pick a style.

Style

Drag a photo of the empty room here

JPEG or PNG, up to 20 MB. One free preview a day — up to 4 renders of the same photo, in any style.

The preview above is free and does not need an account. It carries a watermark; the paid file is the same render without one. Six photos is $9 once, and photos you do not use do not expire — the difference from a subscription, and the reason we do not sell one. If you are choosing between tools rather than between methods, best virtual staging software compared side by side.

Adding furniture to a photo for free: what is actually free

“Free” means different things on different pages, so here is the honest breakdown for each of the three routes.

The preview

Free, unlimited in principle, and no account. You see the furnished room before any money moves. The file carries a watermark, which is the only thing you are buying your way out of.

The download

$1.50 a photo on the 6-photo pack. Not free, and worth saying plainly: a listing photo that decides a sale is not the place to accept a watermark.

Editing by hand

Free in money, expensive in time. Photopea and GIMP are free; the four problems above are yours to solve.

Free trials elsewhere

Most tools offer two or three free images. Read whether the free images are watermarked and whether a card is required at signup — that is where the $16/month starts.

What a virtual staging furniture set contains

“Virtual staging furniture” is the same job under a different name: the furniture is not real and never ships, it exists only in the image. What gets added depends on the room, but a living room set is predictable:

  • A sofa or sectional scaled to the wall it sits against
  • Coffee table, plus one side table if there is a corner for it
  • A rug large enough that the front legs of the sofa sit on it
  • One large piece of wall art, hung at eye level relative to the ceiling
  • A floor lamp or a pair of table lamps — light sources read as inhabited
  • One plant or one object with a curve, to break the straight lines

Two rules hold across every room. Furnish to the traffic path, not to the walls — a sofa pushed flat against all three walls makes a room look smaller, and buyers read that as a small room. And leave one wall mostly bare; a fully furnished room hides the thing being sold, which is the space.

Which route, by how many photos you have

MethodTimeCostHow real it looksPick it when
Shoot empty, add with AI2 minutes$1.50 / photoConsistent lighting and perspective, because the model re-lights the roomYou have more than two photos to do, or you are on a deadline
Composite it by hand1–3 hours$0As good as your eye for shadow and perspective — most first attempts read as pastedOne photo, and you already know Photopea or Photoshop
Hire an editor1–2 days$16–$24 / imageHighest, and you get a person to argue with about the layoutA luxury listing where the staging is part of the marketing

Editor rates are BoxBrownie’s and Styldod’s published per-image prices, checked 2026-11-12. They charge per finished image, so a second style is a second charge.

Do it on your own room before deciding anything

The whole argument above reduces to one question you can answer in two minutes: does the furnished version of this room hold up? Upload it, pick a style, look. If it does not, no amount of tool comparison will help and the problem is the source photo — route 1.

If it does hold up, the next question is what the whole listing costs rather than what one photo costs: the per-photo, per-pack and per-listing arithmetic is here, including the packs where a cheaper unit price costs more cash. And if you are still choosing a tool rather than a method, the best virtual staging software is ranked here by how you pay, with the billing models side by side.

One room, free to try

Upload the empty room, pick a style, see it furnished. $9 for six photos if you keep them — no subscription, nothing to cancel.

Add furniture to my photo

Questions people actually ask

Can I add furniture to a photo for free?+

Yes, two ways. Editing by hand in Photopea or GIMP costs nothing but an hour or three. On this site the preview is free and needs no account — you upload the room, pick a style and see the result. What costs money is the clean download without the watermark: $1.50 a photo on the 6-photo pack, dropping to $0.20 at the 350-photo pack.

What if the photo already has furniture in it?+

Then you are asking the wrong question of this tool. The model is built for empty rooms: pieces already in the shot are treated as things to replace, so the result is a re-furnished room rather than your room plus new furniture. If the existing furniture has to stay, compositing by hand or hiring an editor are the honest options.

Will the result look real enough for a listing?+

Look at it before you pay — that is what the free preview is for. What virtual staging cannot fix is a bad source photo: a tilted frame, a flash shadow, or a room shot from standing height all survive into the output. Everything about the walls, windows and doors stays as photographed, and the furniture is lit to match the room rather than pasted in on top of it.

Do I have to disclose that the photo was staged?+

In most US MLSs, yes — a virtually staged image has to be disclosed. Every delivered image can be downloaded clean or with a disclosure label you can reword, and each one comes with a disclosure record listing what was altered. Check your own MLS's rule first: some boards require the label on the photo, others ban text on the photo entirely.

How many photos do I need for one listing?+

Six is the usual number: living room, kitchen, primary bedroom and bath, plus the exterior and one more room. That is one $9 pack. If a photo comes back wrong you can re-render it in another style inside 24 hours without spending another credit, which is why six photos is often six photos and not ten.

Which furniture style should I pick?+

Match the price point of the house, not your own taste. A $250k starter home furnished in a luxury palette reads as a flip that spent money in the wrong place; a $1.2M listing in a bare Scandinavian set reads as unfinished. Mid-century and farmhouse are the safest middle, coastal only if the house is actually near water.

See also our terms, acceptable use policy and privacy policy.